
Google Tag Manager installation
Install Web-Stat
with Google Tag Manager.
Add your tracking code as a Custom HTML tag, choose when it runs, and publish your container to start seeing visitors.
Sign in to retrieve your code, or create a free account.
Before you begin: your Google Tag Manager web container must already be installed on the pages you want to track.
Set up your tracking tag
Select any screenshot for the complete view.
-
Create a new tag
Sign in to Google Tag Manager and open the web container installed on your website. In its workspace, select Add a new tag, or open Tags and select New.
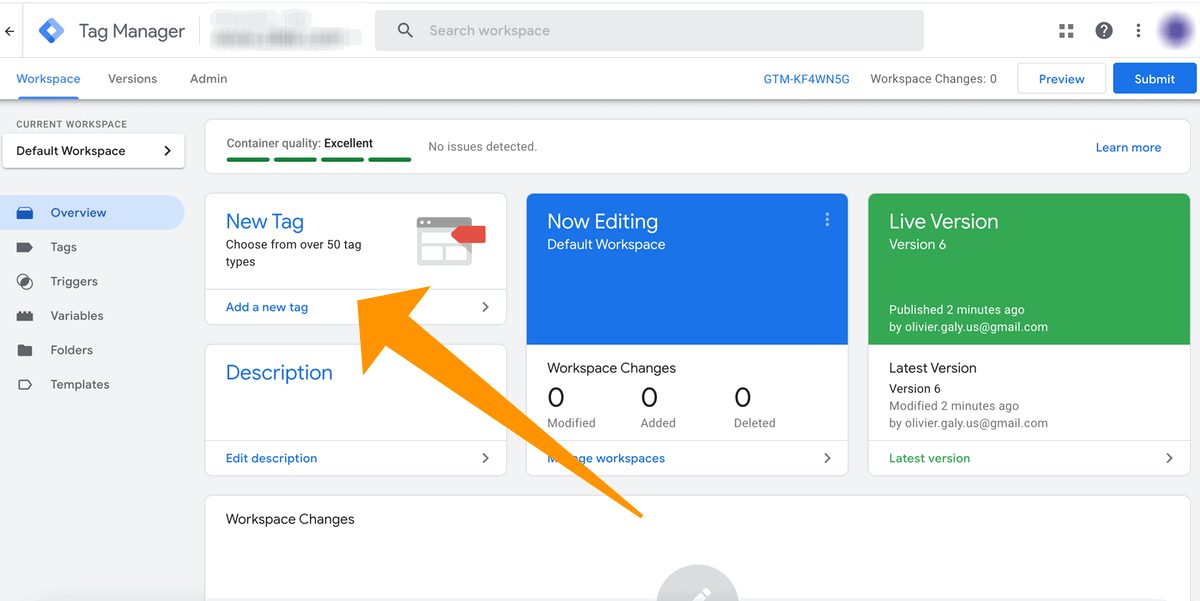 View full screenshot
-
Choose Custom HTML
Open Tag Configuration to choose a tag type, then select Custom HTML from the list.
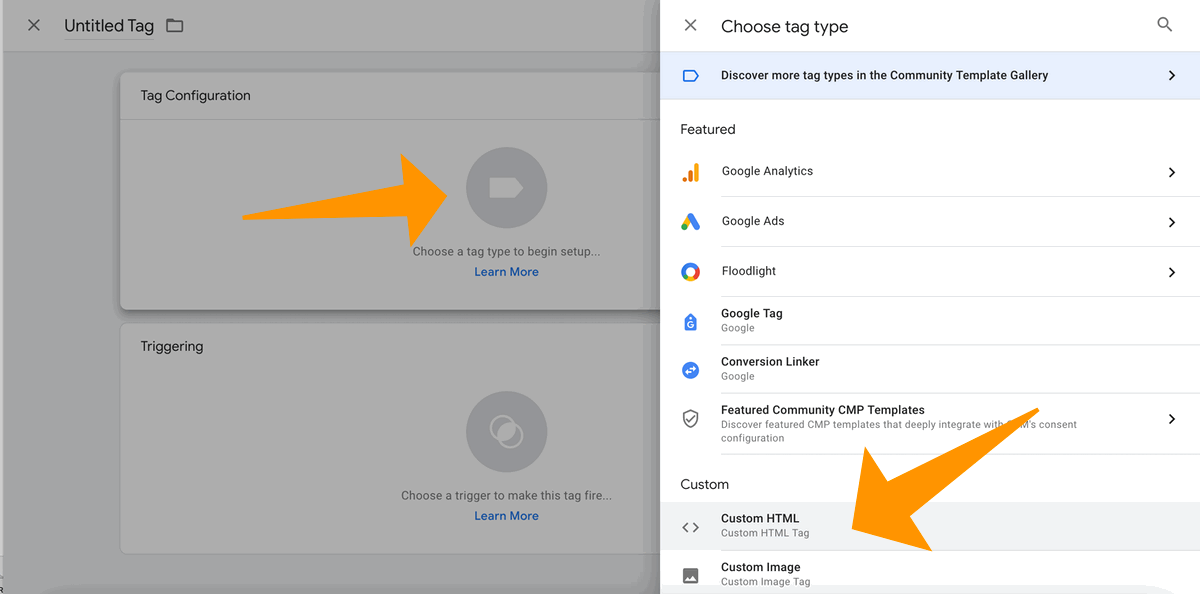 View full screenshot
-
Paste your tracking code
Open your Web-Stat installation page and copy the complete tracking code for your website account. Paste it into the Custom HTML field. Use the code from your account, rather than the example shown in the screenshot.
Get my tracking code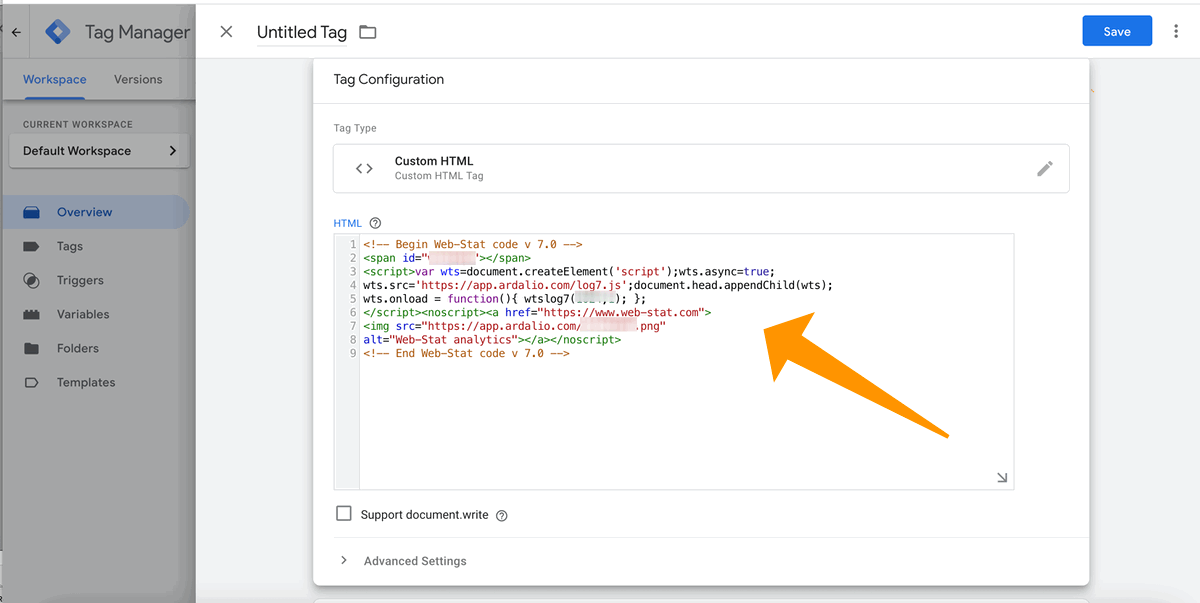 View full screenshot
-
Choose the All Pages trigger
Open Triggering, then select the All Pages page-view trigger so the tag can run on each page where your container is installed.
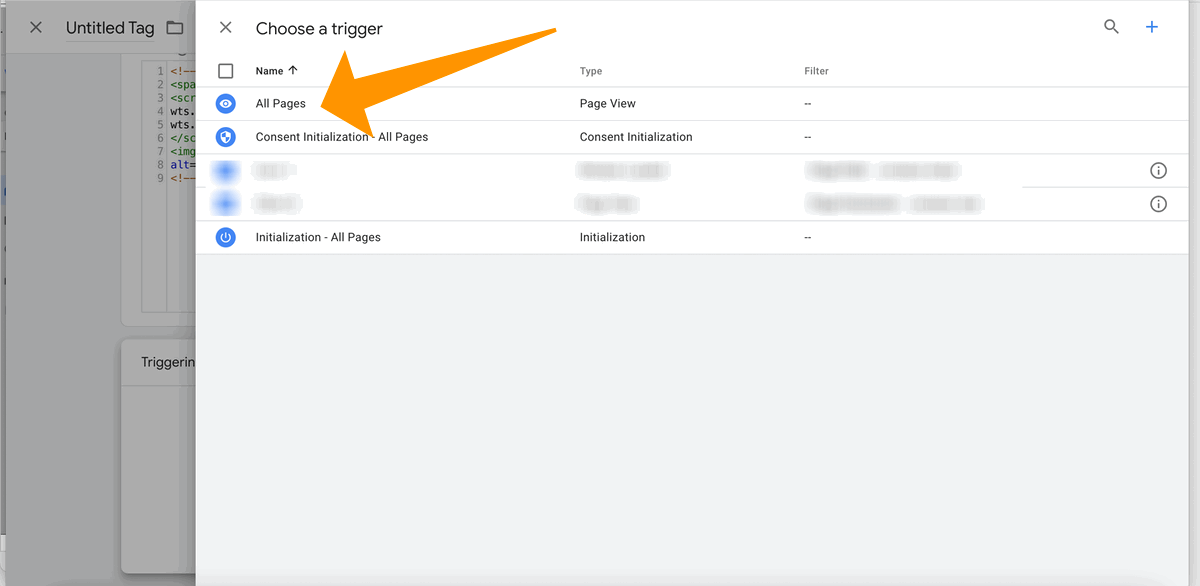 View full screenshot
-
Name and save your tag
Give the tag a name you will recognize, such as Web-Stat tracking. Check that your code and the All Pages trigger are present, then select Save.
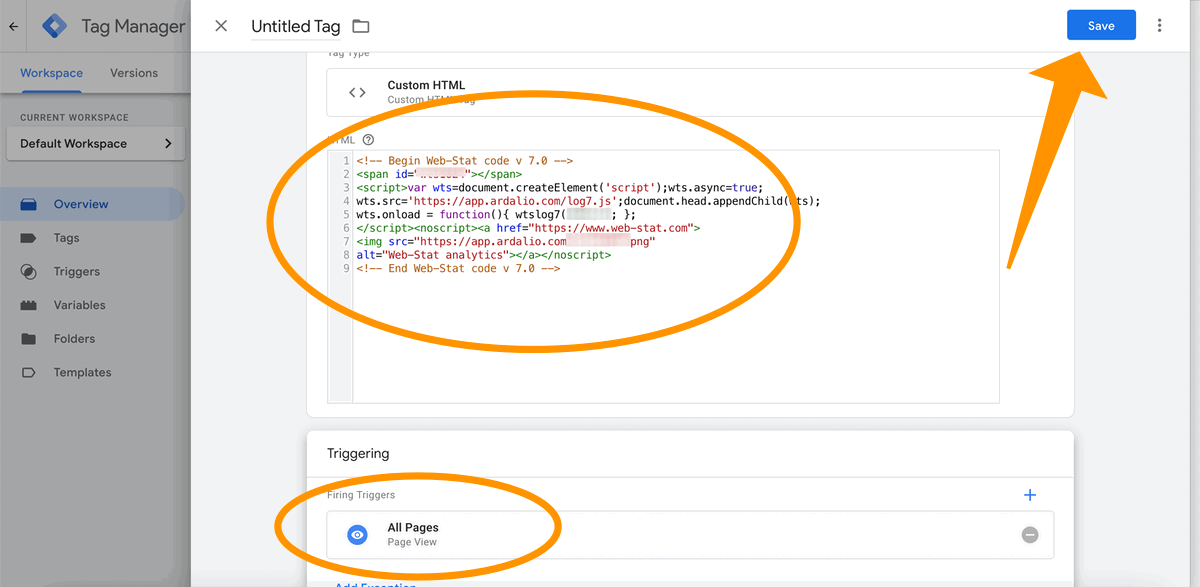 View full screenshot
Check your tag before publishing
Use Preview in your Tag Manager workspace to open Tag Assistant and connect it to your website. Browse a few pages and check that your tracking tag fires on the expected pages.
Keep one installation of your tracking code per page. If the same account is already installed through a plugin or directly in your HTML, use a single installation method.
Publish your changes. Then check your visitors.
In your Tag Manager workspace, select Submit, then Publish and Create Version. Review your changes, enter a version name, and select Publish for your live website. Saving the tag alone does not make it live.
After publishing, open your live website and browse a few pages. Then open Live Visitors to check the result. If you have excluded your own visits, test from a device or connection that is not excluded.
Need a hand? We can help you get tracking working.
See other installation guides